
December 6 & 7, 2026 - Red Butte Garden Holiday Open House and Gift Fair. Learn More Here
May 14 - 17, 2026 - Salt Lake Art Show at the Mountain America Expo Center, Sandy, UT
December 6 & 7, 2026 - Red Butte Garden Holiday Open House and Gift Fair. Learn More Here
May 14 - 17, 2026 - Salt Lake Art Show at the Mountain America Expo Center, Sandy, UT
Purchase Red Dragon Glass: Shop Red Dragon Glass
Click this link to sign up for the Red Dragon Glass Art Newsletter Sign up now!

Email Red Dragon Glass Art
See the Google Map http://goo.gl/maps/QBFoQ
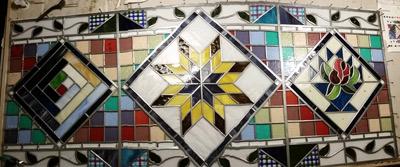
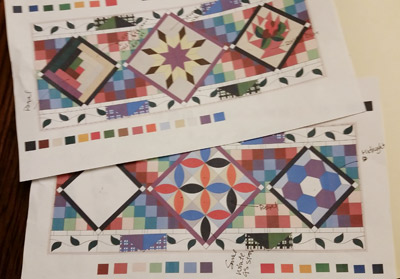
For the past several months, I've been working on this project for The Quilter's Lodge. The initial design meetings took place as the building was under construction, and I though it might be fun to share the design process of a large project like this. The finished project will consist of 2 panels 30" high and 72" wide.
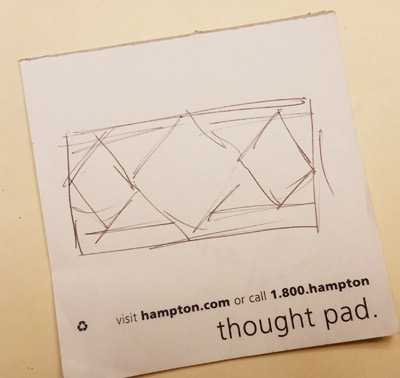
After the initial meeting I had a basic idea of what the design would be - quilts of course, but how to make it interesting? The thing is, inspiration hits at the most random time. Early one morning, while on a business trip for my day job, the idea hit me...
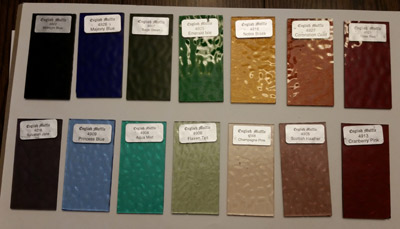
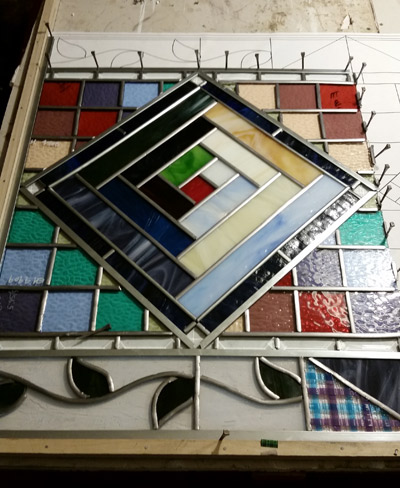
I had several design issues to resolve. Choosing colors for the background is a huge one - interesting colors that don't overpower the main design. My first choices (top row) ended up looking too much like a rainbow, and my second choices (bottom row) were more muted and wouldn't be distracting.
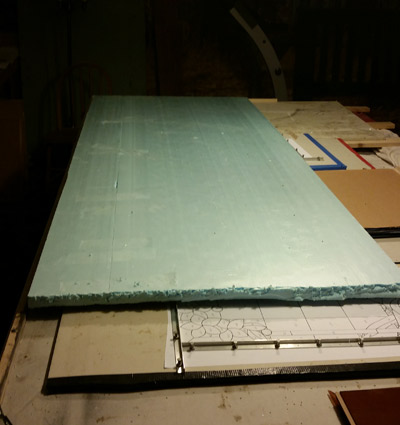
Another issue: Since these will be the largest single panels I have constructed so far, and I've got a tricky turn into my basement studio, would I be able to get it out of the basement once it was built? So, in the garage I cut a piece of foam insulation to 30" x 72" and hauled it down the stairs, into the studio - SUCCESS!!
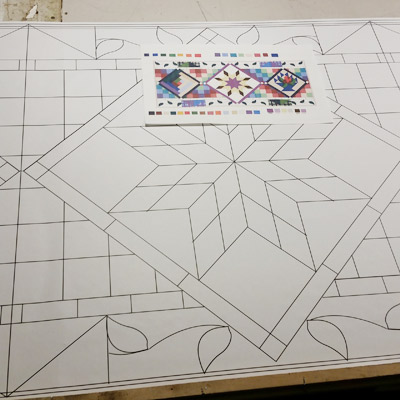
The two panels were 95% completely designed - enough to start work.
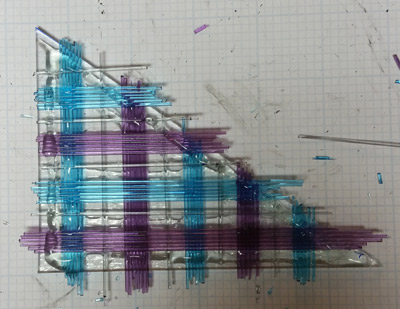
In an earlier blog I showed how I created "plaid" glass. Now it was time to do it for real.
To get an idea of the scale, here's the color plan printed on legal sized paper sitting on the actual pattern.
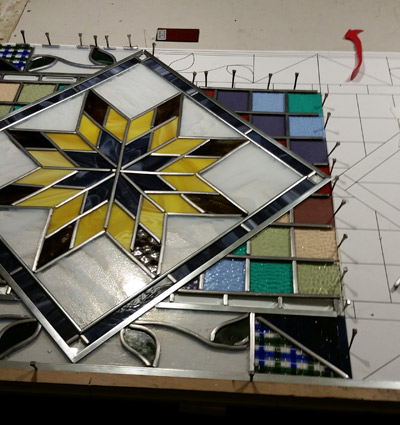
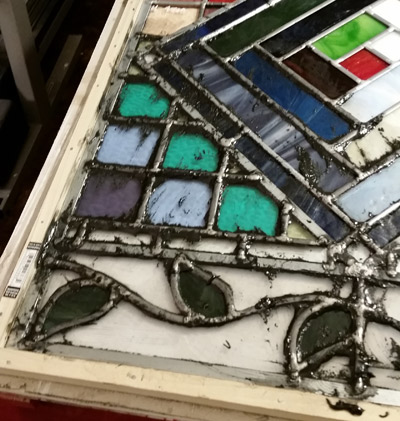
And, I'm cutting glass and fitting it in the lead channel. If you're not familiar with leaded glass, lead came is an "H" shaped channel and glass is fitted into the channel. Those are horse shoe nails holding everything in place as I work.
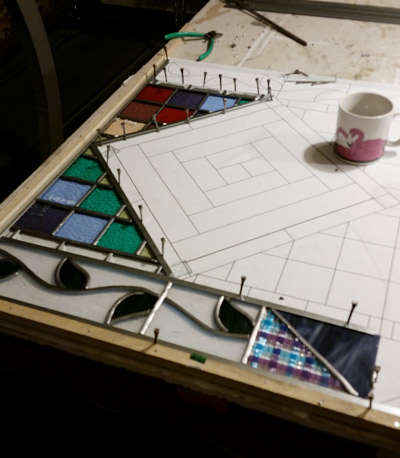
I'm building internal reinforcements instead of adding them at the end, so there is zinc channel incorporated into the design at various points. By using a variety if zinc channel widths it adds interest to the design as well as strength.
This panel has quilt squares representing the Log Cabin square
Lone Star
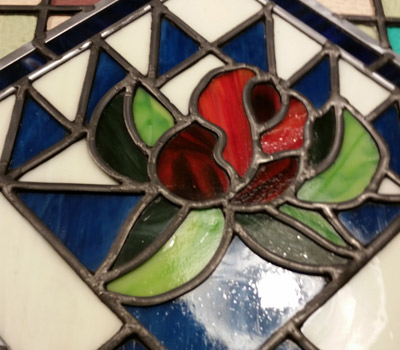
And Flower Basket Applique
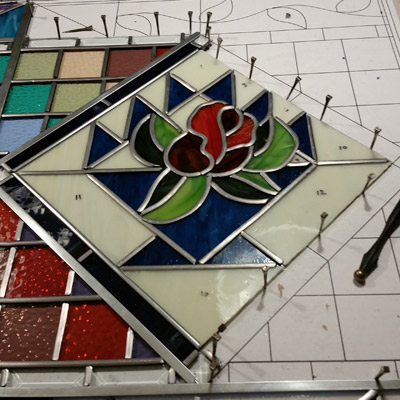
Once all the glass is assembled a zinc frame is added to the outside edges

There is still a lot of work left to do. Every piece of lead and zinc joint has to be soldered together. The secret is to make a nice smooth solder - some days that's not as easy as it sounds.
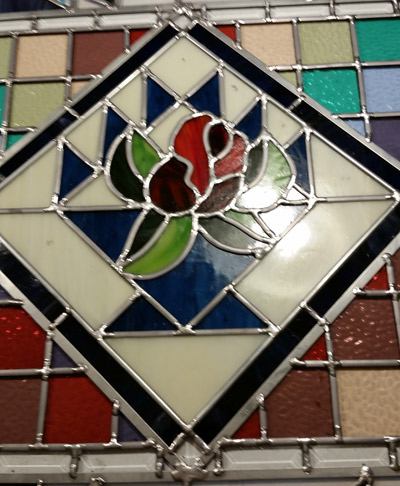
After soldering is complete it's time to cement the glass. Cementing seals any gaps between the glass and the lead channel. This serves two purposes - it adds additional strength and prevents air from passing through. I use Miracle Mud and mix up as much as I need for one project at a time.
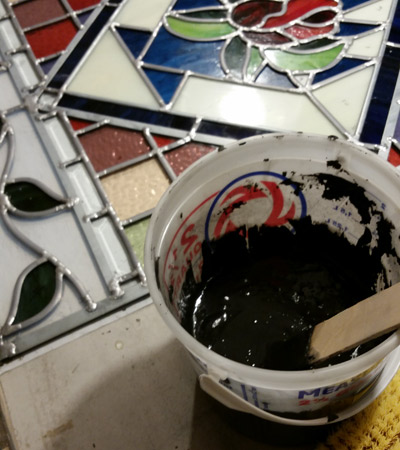
Cementing is a messy process. And since it involves lead, I'm wearing gloves, apron, dust mask, safety glasses and working up a sweat. After rubbing cement on all the lead and working it under the edges, I work it in further with a natural bristle scrub brush.
After brushing as much of the excess cement off as I can, it's time to clean and polish with whiting powder. I use a buffer attachment for my power drill and it cleans the glass and buffs the lead to a deep, rich luster.
Watch this video to see the cementing process in action:
After the cement has had 24 hours to set up all that's left to do it turn this baby over and start all over again. Will this project ever end?!
Turning a large panel isn't simple. It might have been simpler in a larger space... I'll let you decide.
Stay with us - we still have to crate this panel up in preparation for deliver!