December 6 & 7, 2026 - Red Butte Garden Holiday Open House and Gift Fair. Learn More Here
May 14 - 17, 2026 - Salt Lake Art Show at the Mountain America Expo Center, Sandy, UT
December 6 & 7, 2026 - Red Butte Garden Holiday Open House and Gift Fair. Learn More Here
May 14 - 17, 2026 - Salt Lake Art Show at the Mountain America Expo Center, Sandy, UT
Purchase Red Dragon Glass: Shop Red Dragon Glass
Click this link to sign up for the Red Dragon Glass Art Newsletter Sign up now!

Email Red Dragon Glass Art
See the Google Map http://goo.gl/maps/QBFoQ
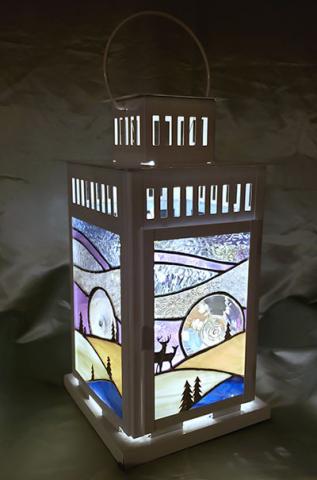
Lanterns are really popular with stained glass artists. If you look online you'll see hundreds of inspired and creative designs. It's a great example of how each artist responds to the same challenge in their own unique way.
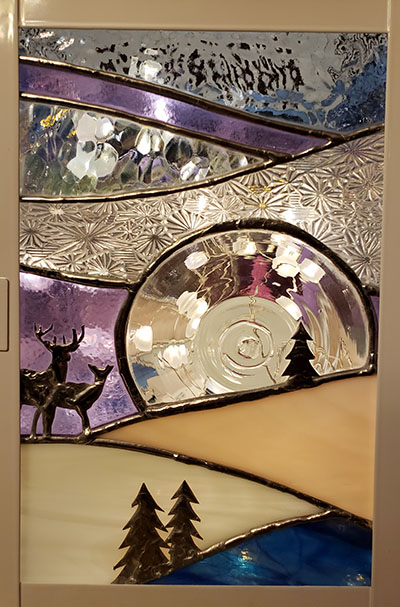
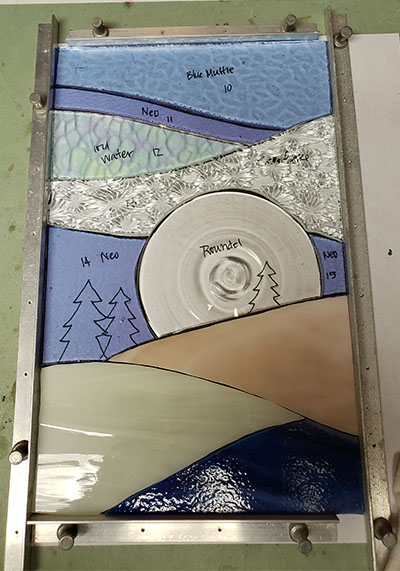
The perameters I was given for this project were: Winter scene, peach and light blue.
I had some textured glass I wanted to include somehow because it reminded me of a snow storm. I pulled some glass from my stock that I wanted to use, hoping it would inspire me. There were a couple of ideas that I just didn't love. Then I had what I thought was the perfect idea. Snow, trees, Northern Lights...
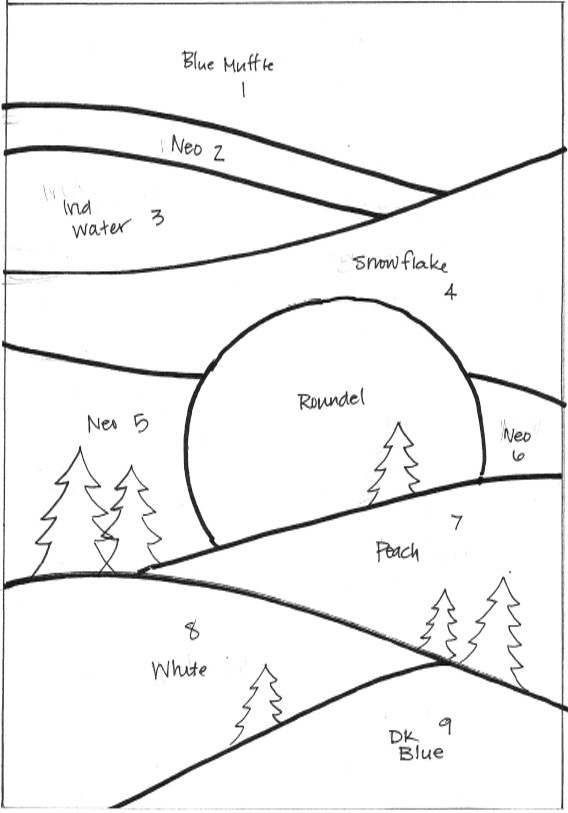
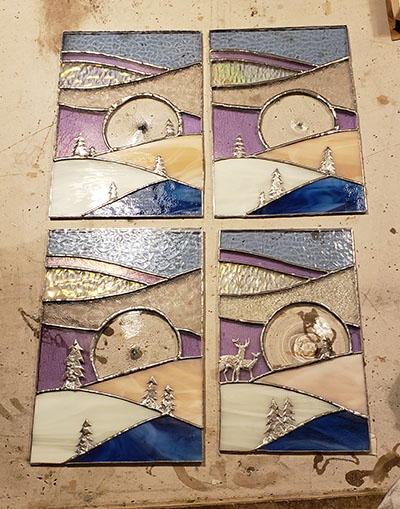
I has to make two sizes of this design - the lantern door panel is generally smaller. The trees would be made from copper foil overlays. I narrowed down my glass choices and got to work - making copies of the pattern and cutting glass. Each rondel had to be trimmed too.
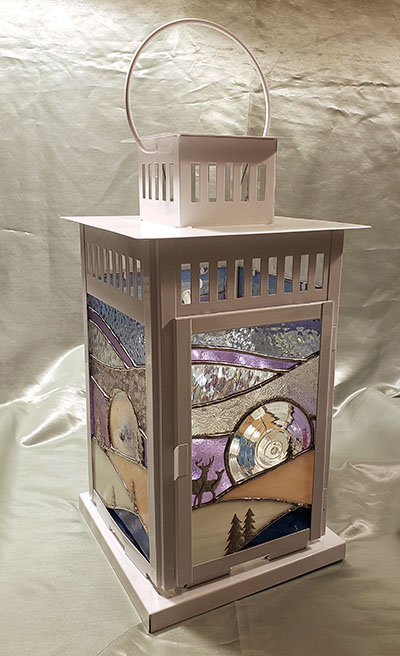
After foiling each piece, it was time to solder. As I worked on the piece for the lantern door I thought, "Deer! There should be deer!" So, instead of trees, I added a couple of deer to the front door panel.
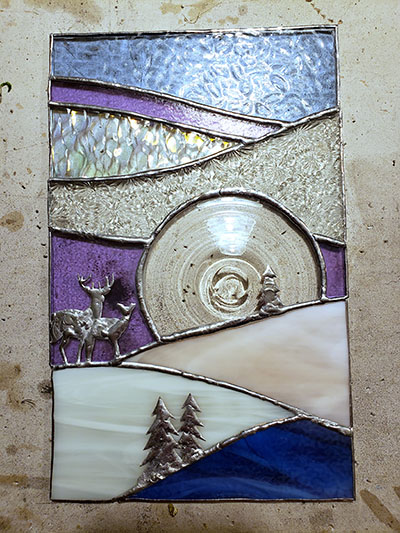
I soldered each panel and put trees in random places among the snow covered hills. Once they were all clean and polished I was ready to insert them into the lantern sides.
The lantern I chose for this project came unassembled - yay, IKEA! - and that made inserting the glass panels so much easier!!! All I had to do was slide them into place and fold down the metal tabs.
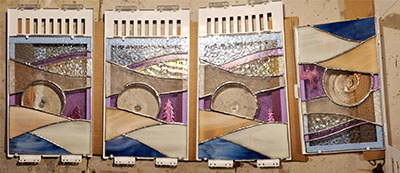
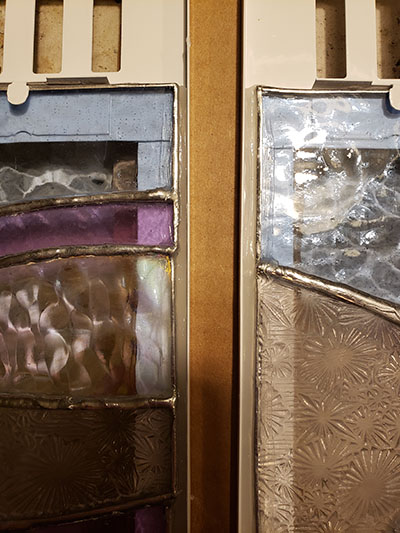
To make the glass more secure, and so it wouldn't rattle in the lantern, I ran a bead of clear silicone along the verticle edges. This is a detailed view.
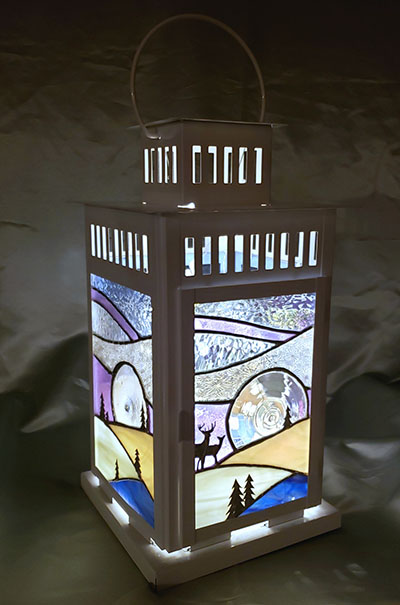
After the silicone was dry, I assembled the lantern and added faerie lights.
 |
 |
It turned out better than I'd hoped!
Here is a detailed view so you can see the textures and iridized coating on the glass that I used. Textures and irid coatings enhance the light and make a design more attractive and interesting to look at.